Creating a Load Balancer Connection
In this step, we will create a Load Balancer.
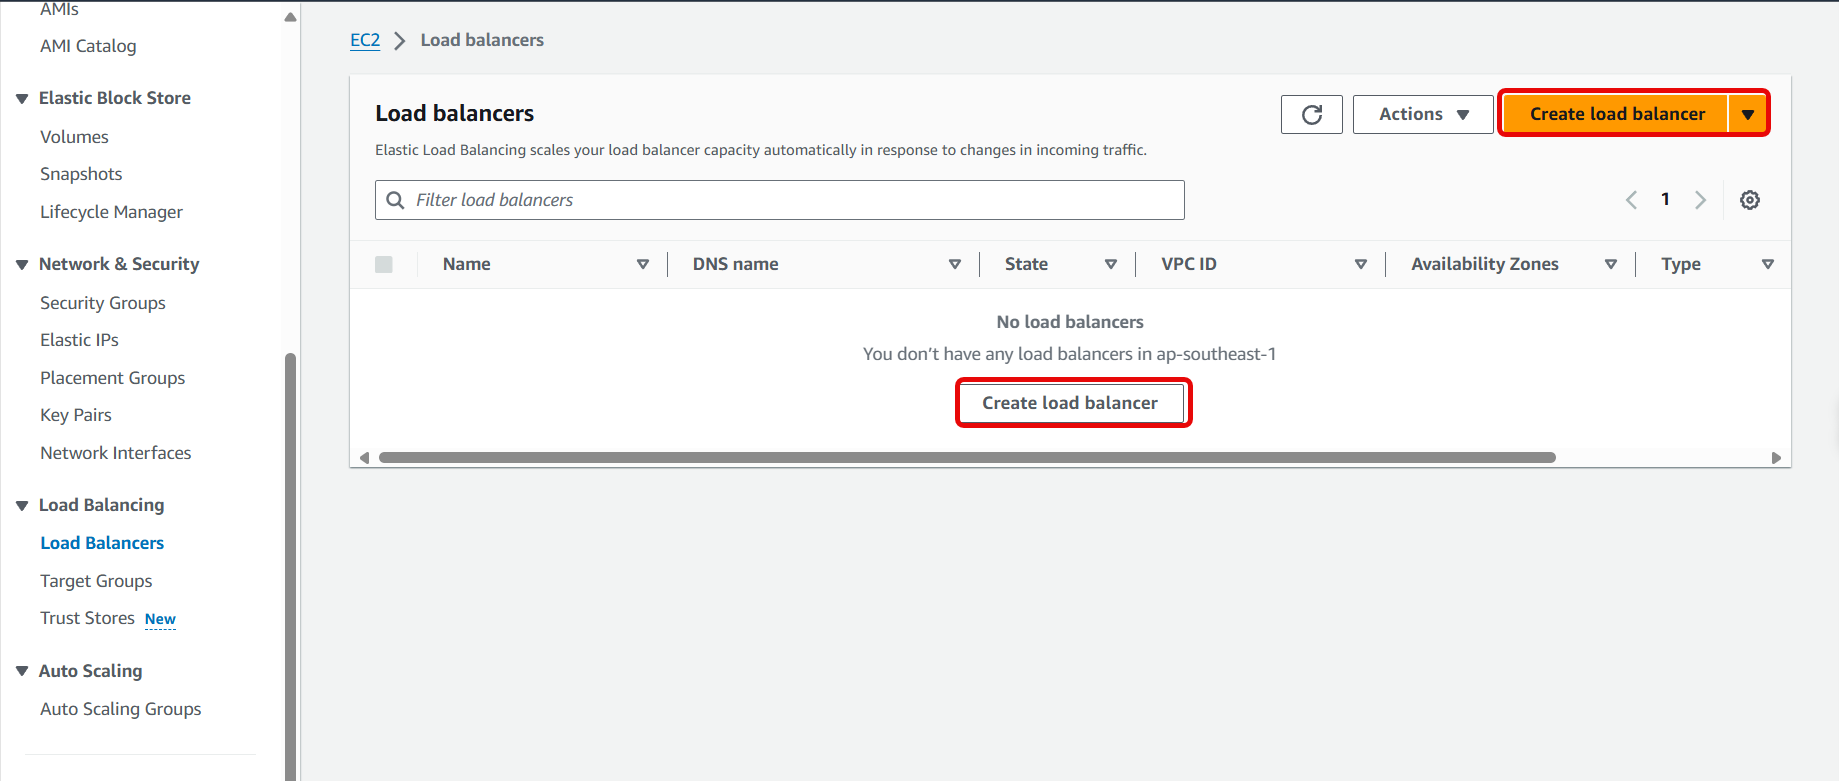
Access the Load Balancer management interface
Click Load Balancer

Click Create Load Balancer
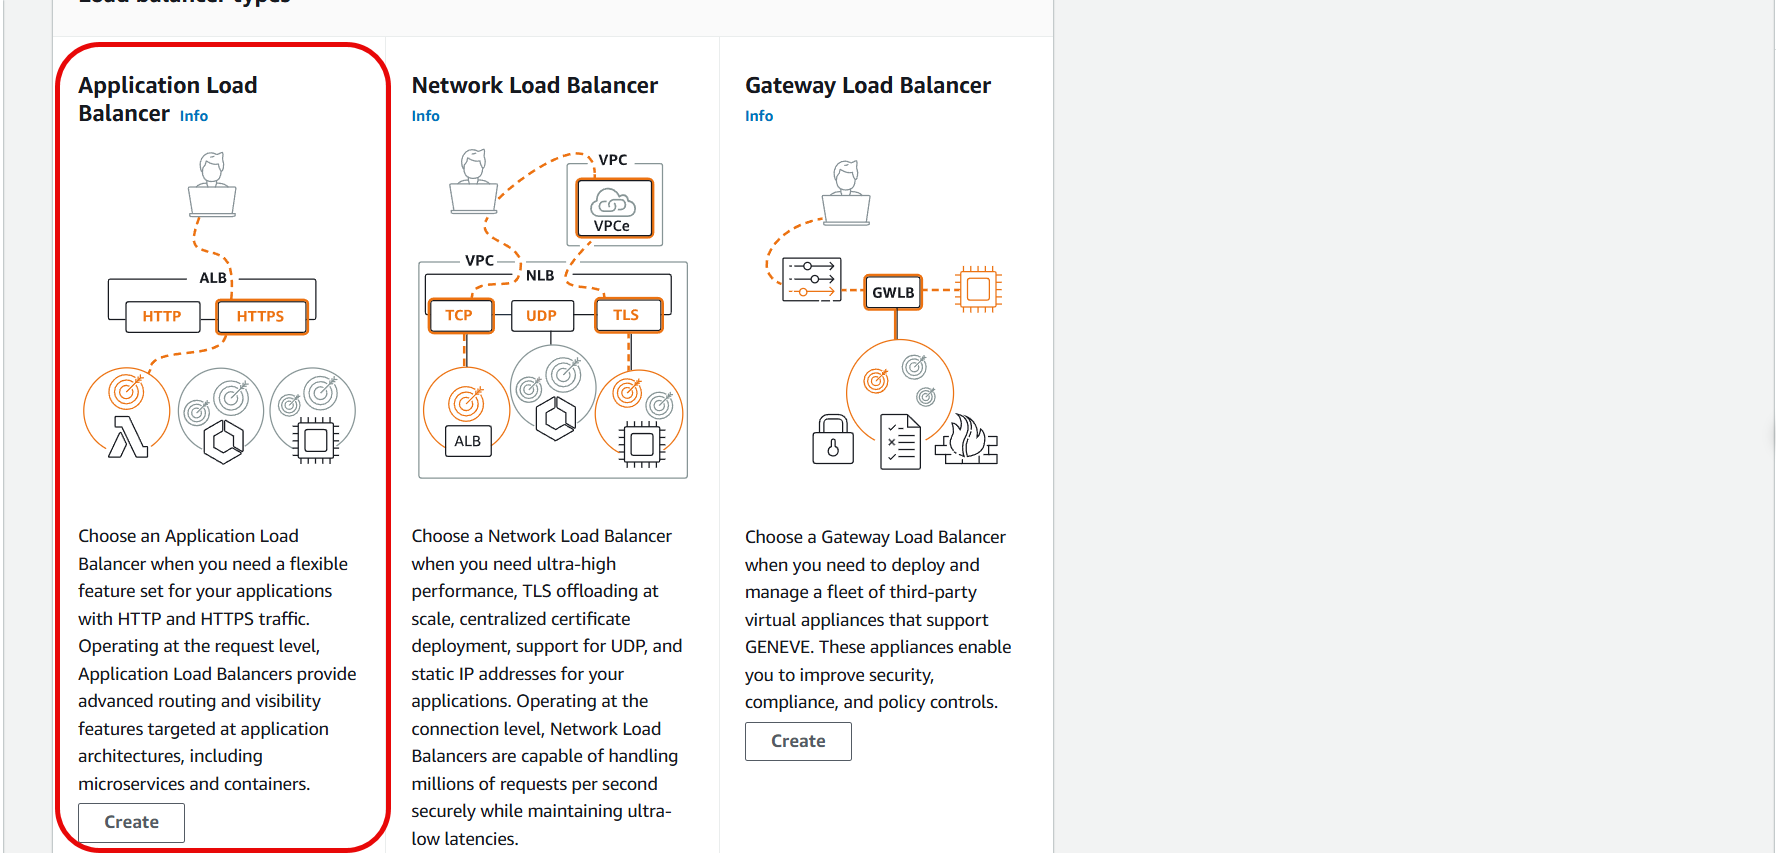
- Click Application Load Balancer
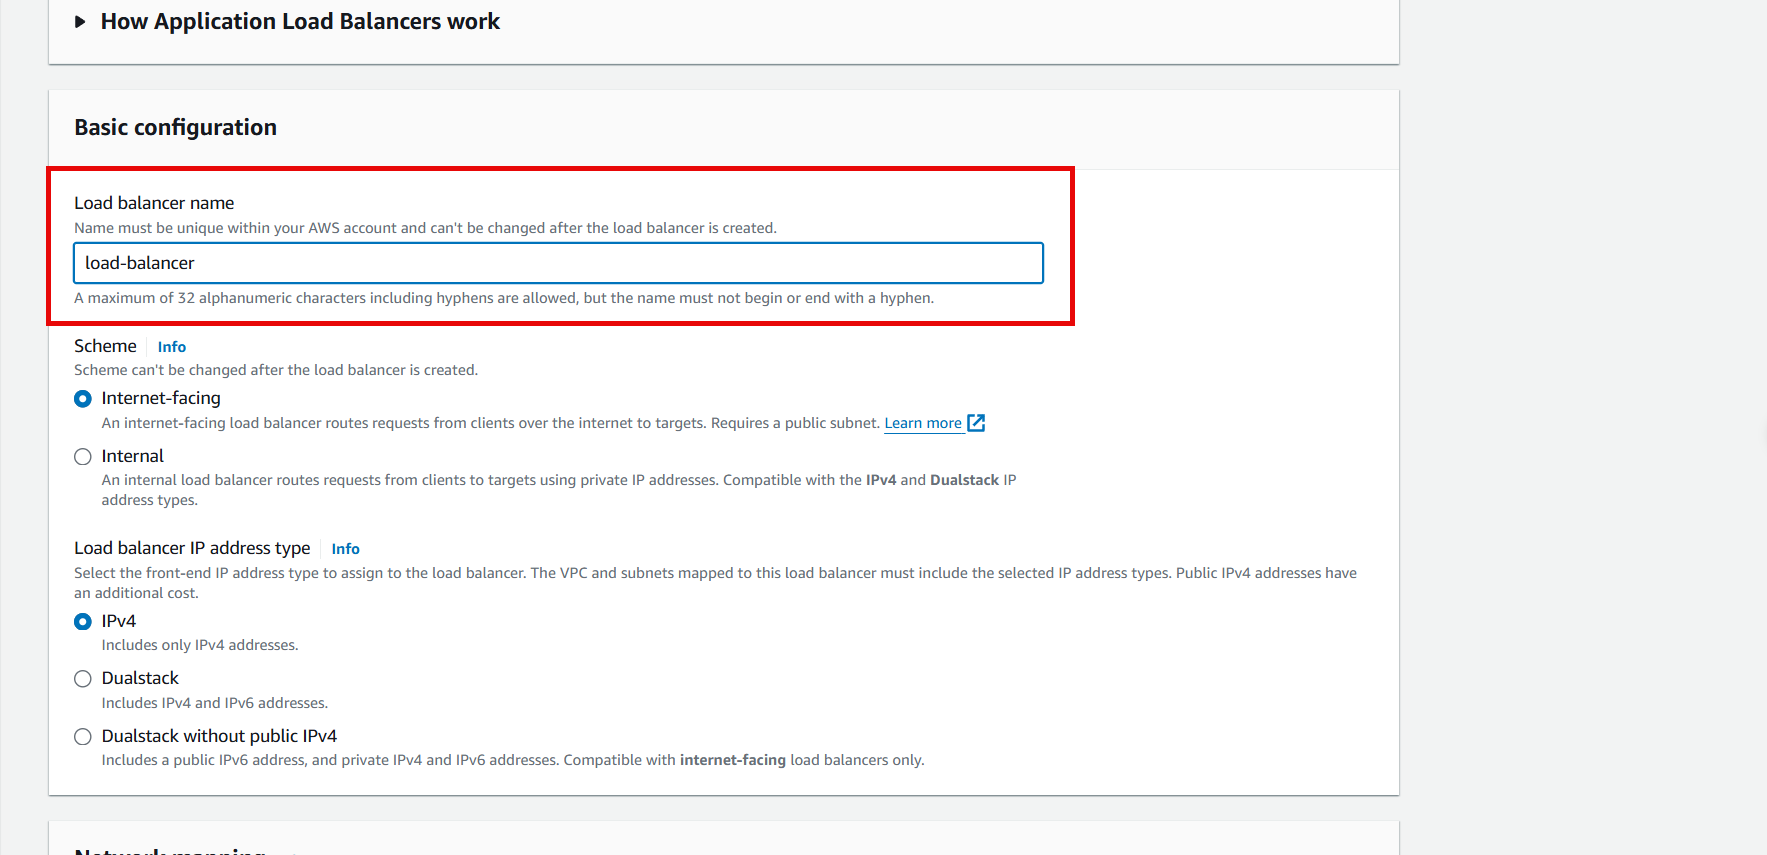
Name the Load Balancer
- Leave Scheme and Load balancer IP address type as default
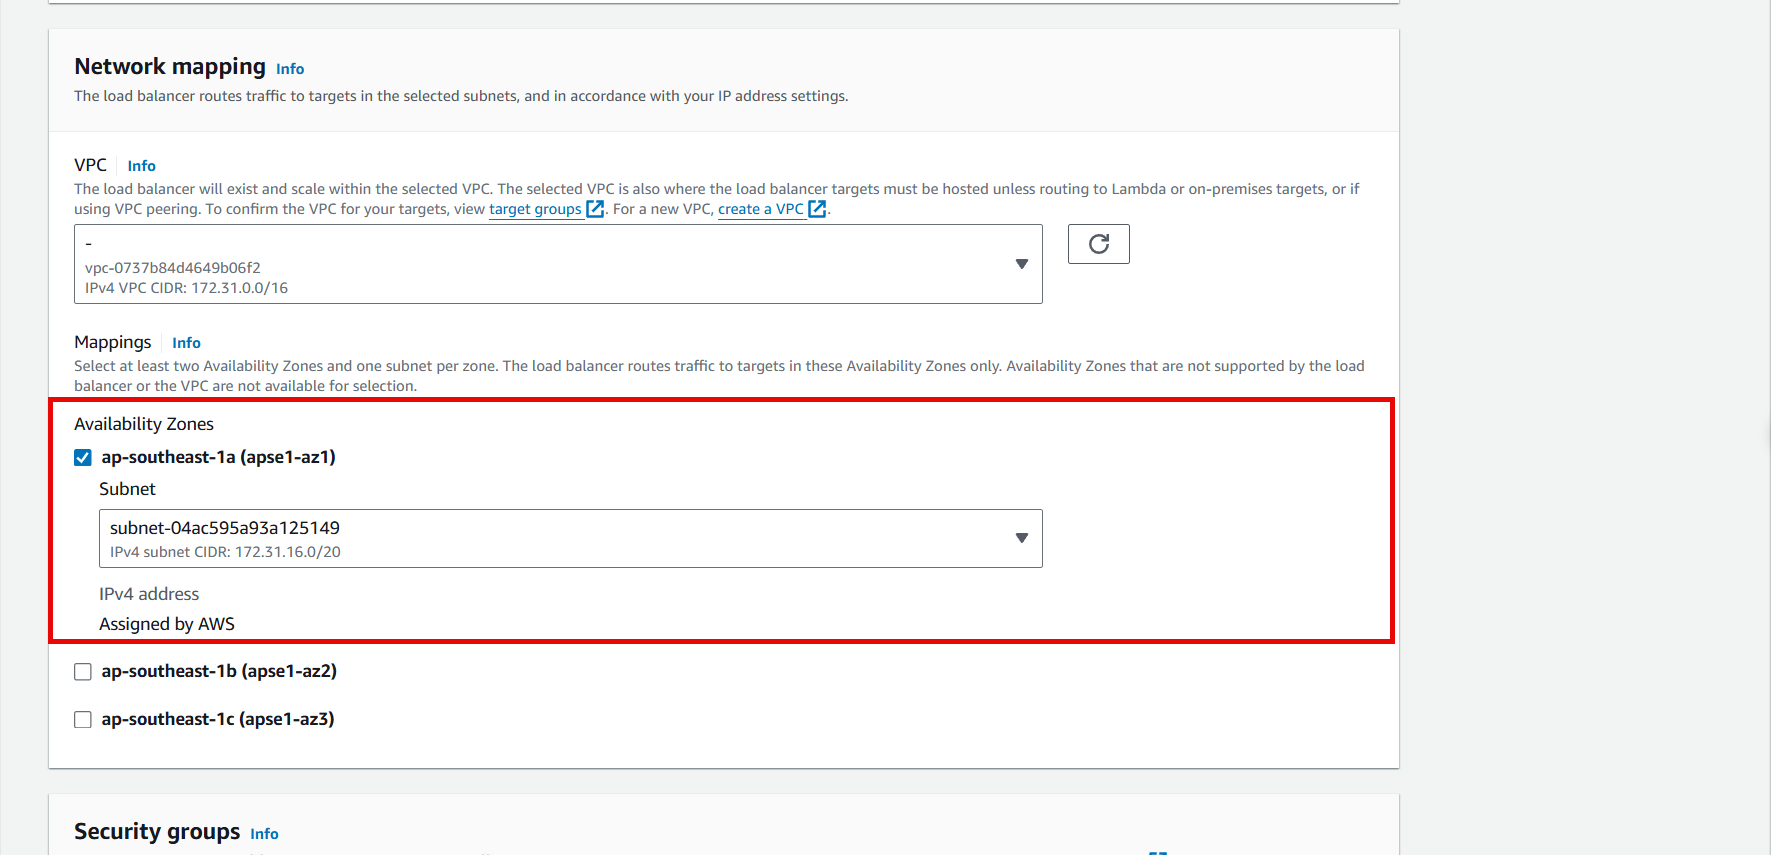
- Select the appropriate AZ, theoretically, it is best to select all AZs for optimization.
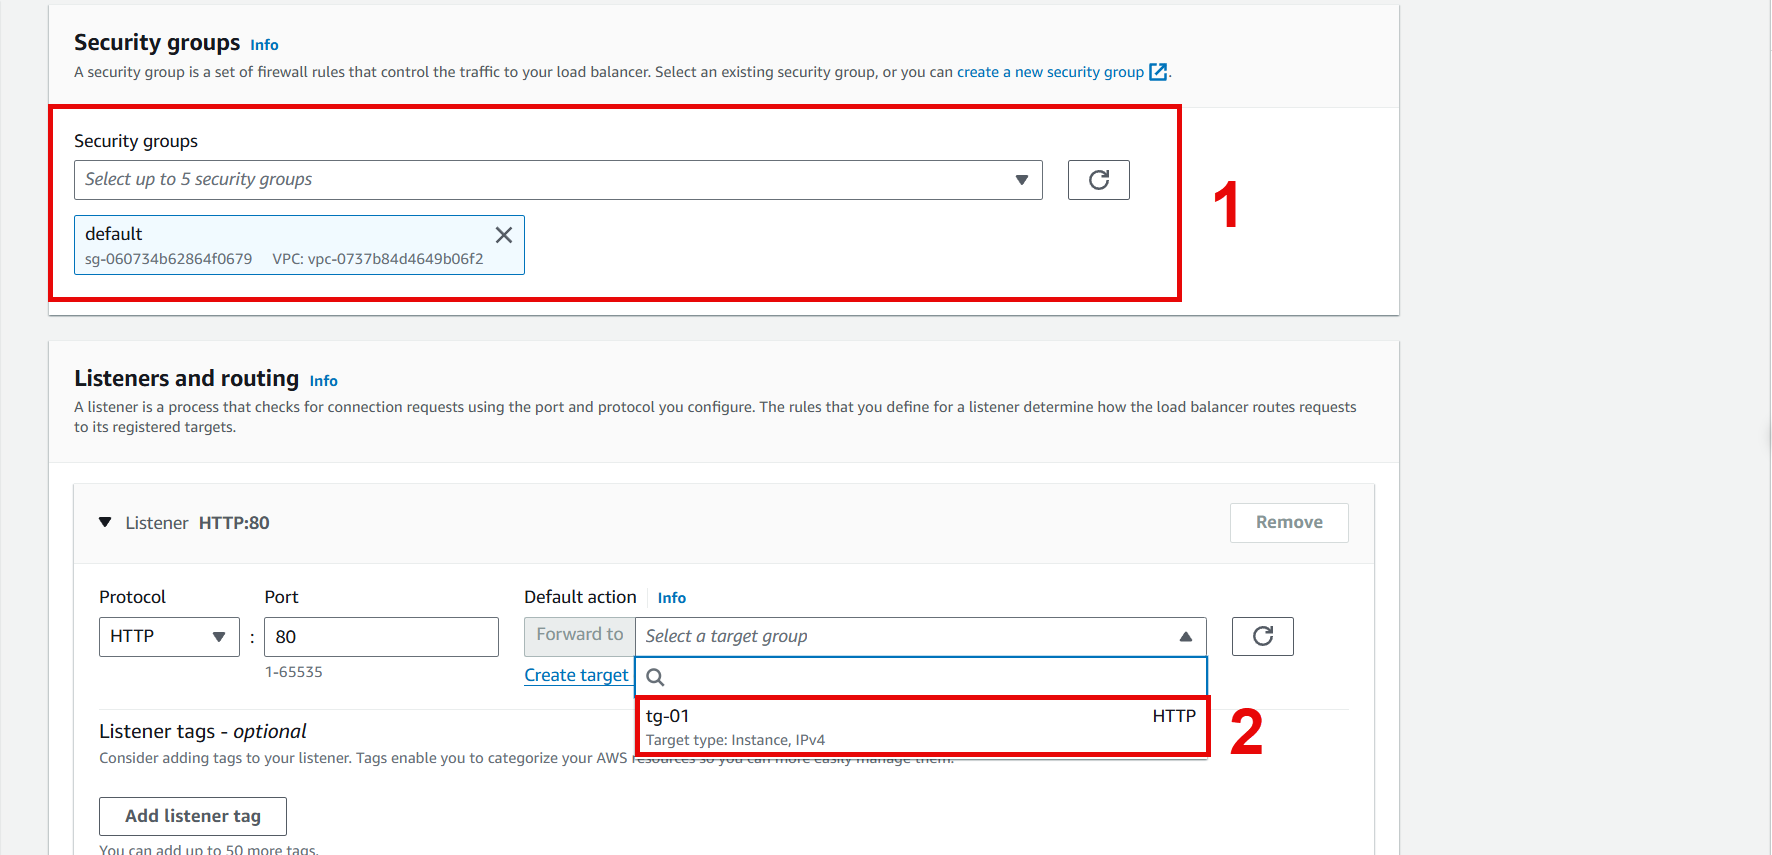
Click to select the appropriate Security group
- In Listeners and routing, select the Target group created in 2.2
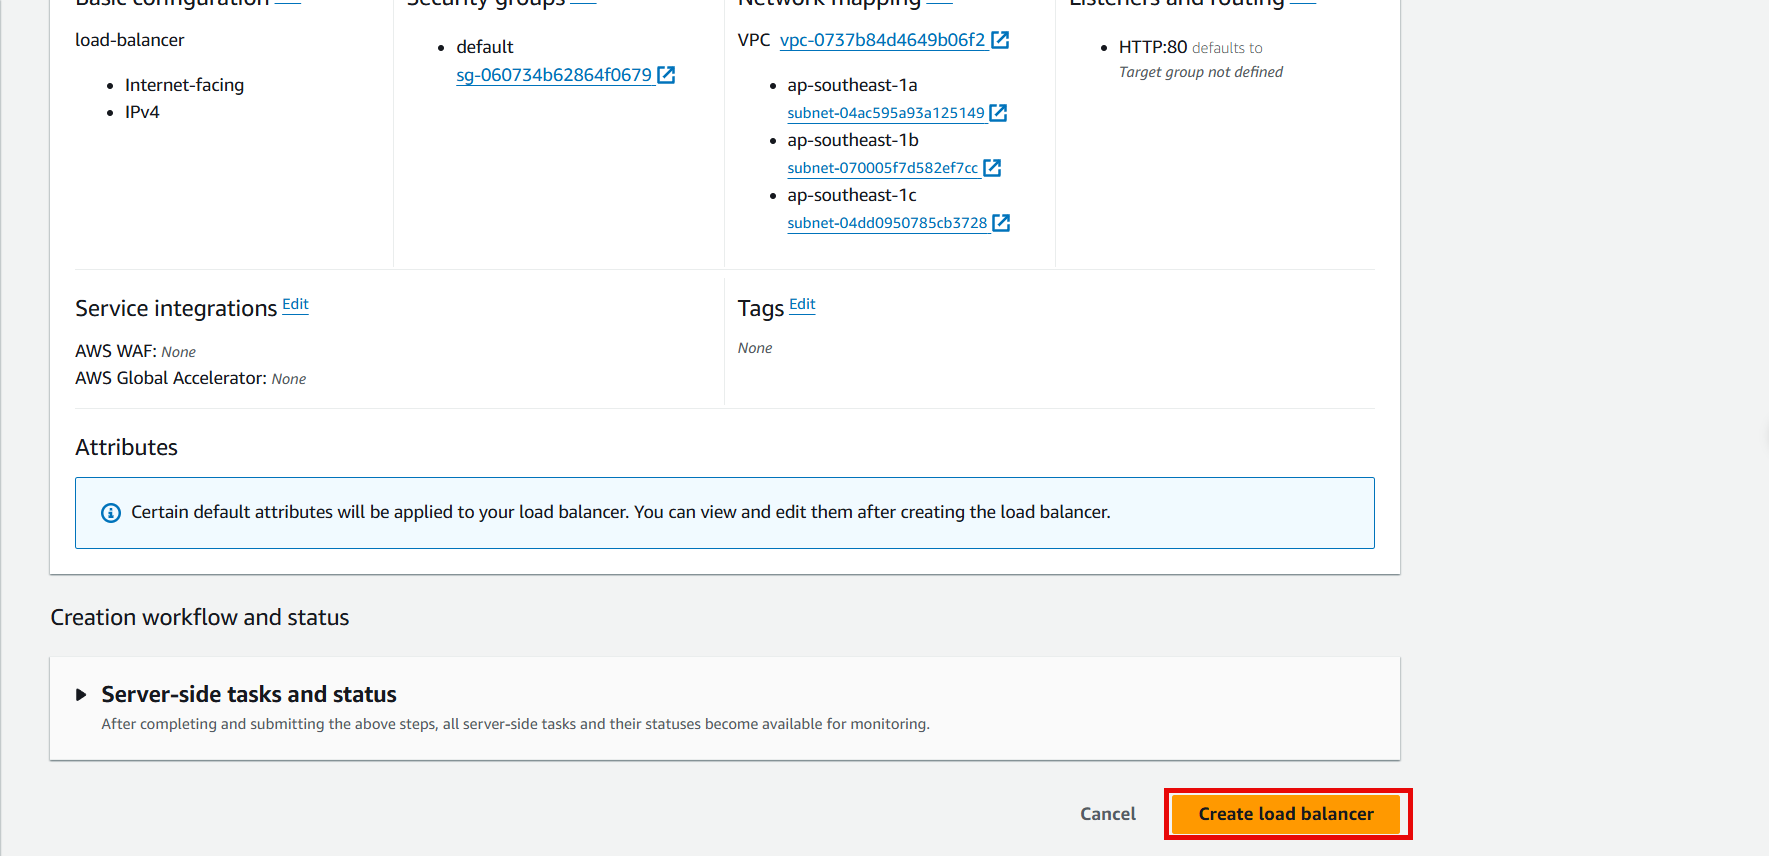
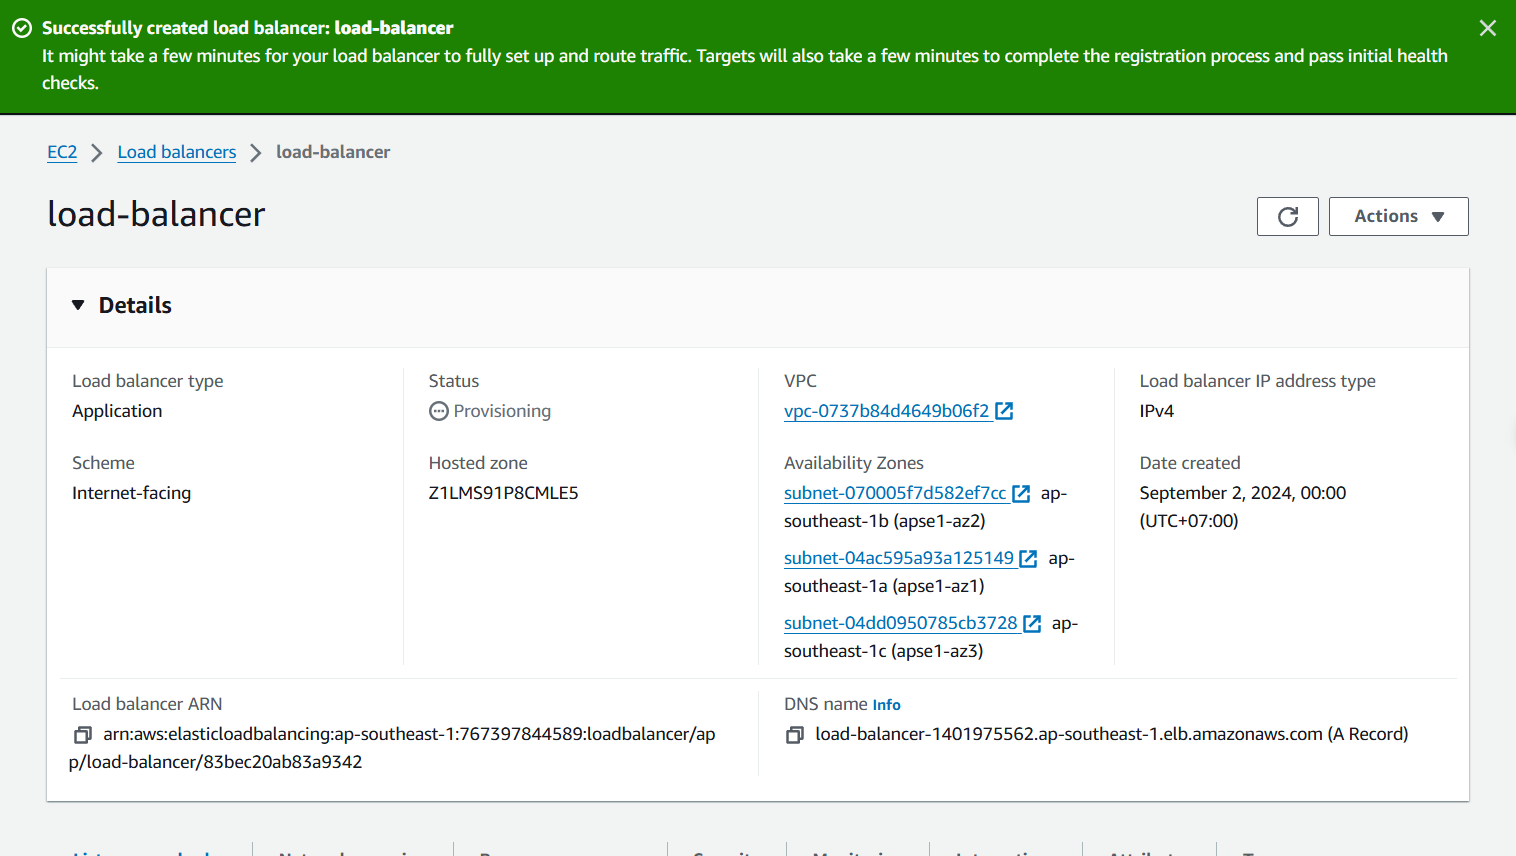
- Click Create load balancer
- Wait about 3-5 minutes for the Load Balancer status to change to Active
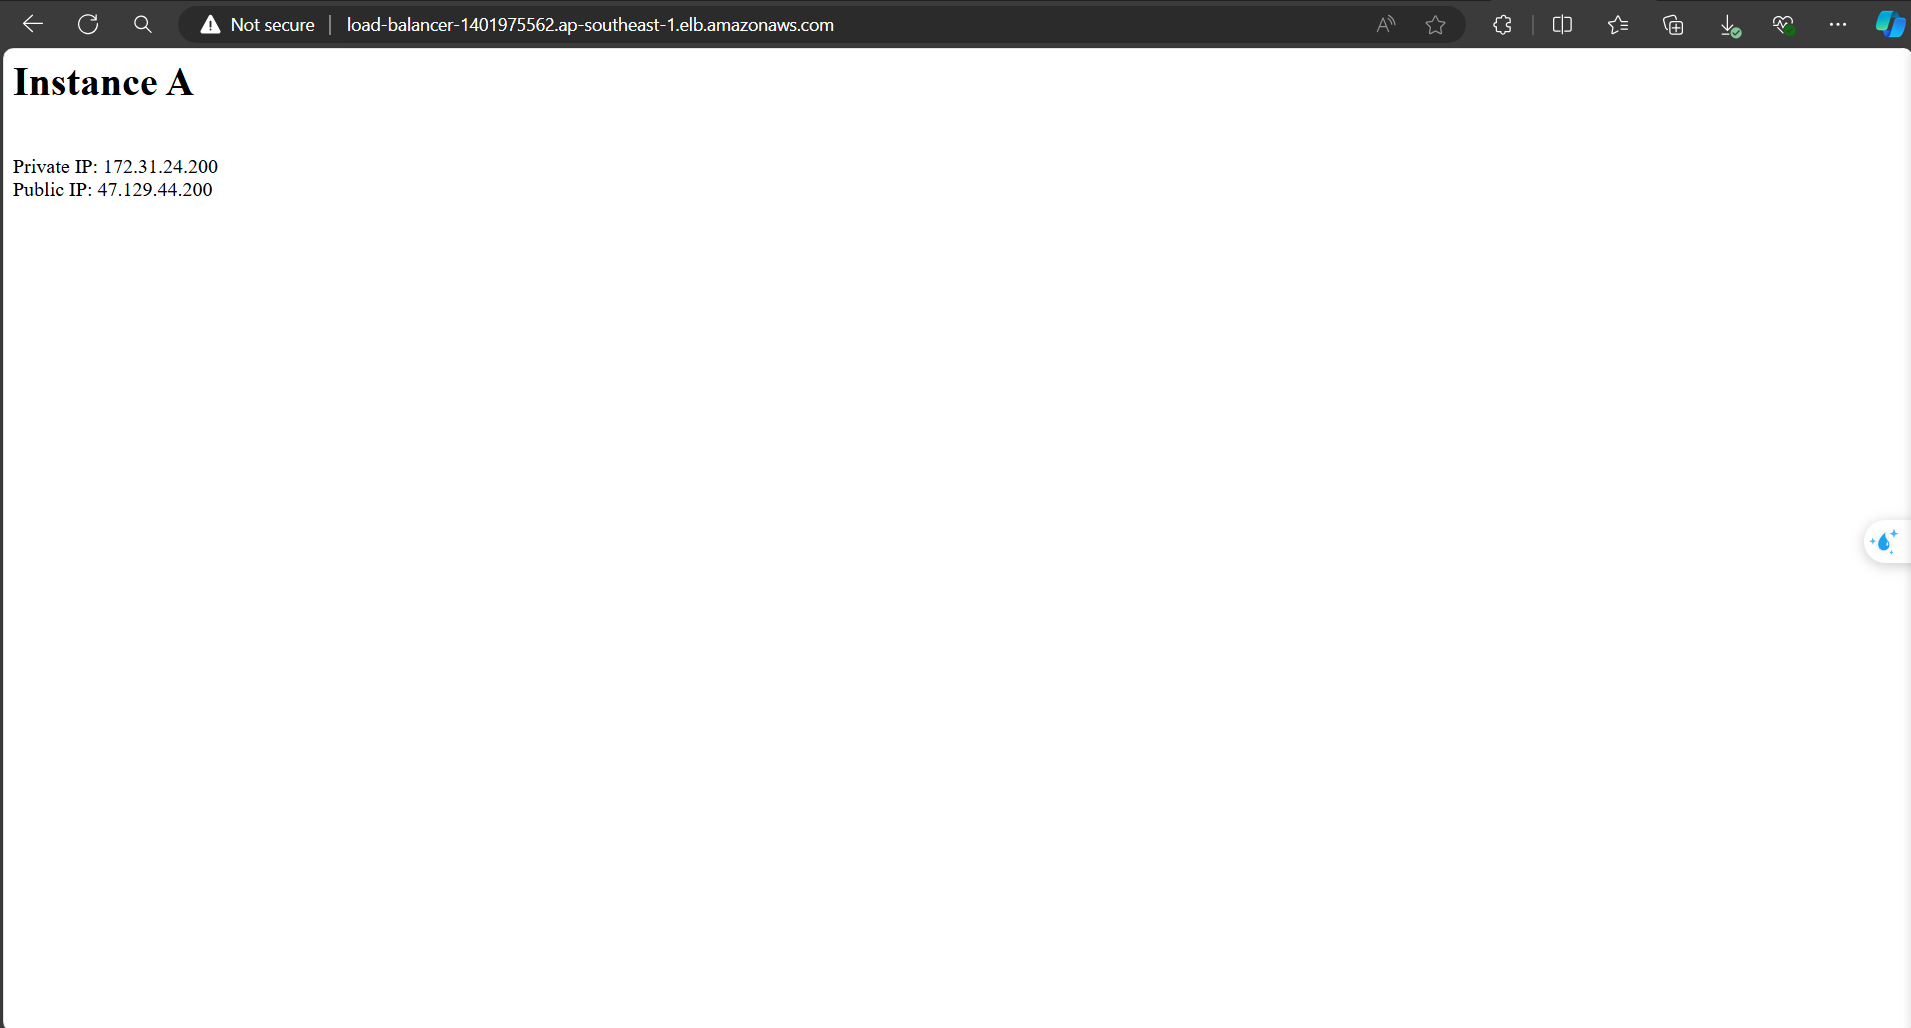
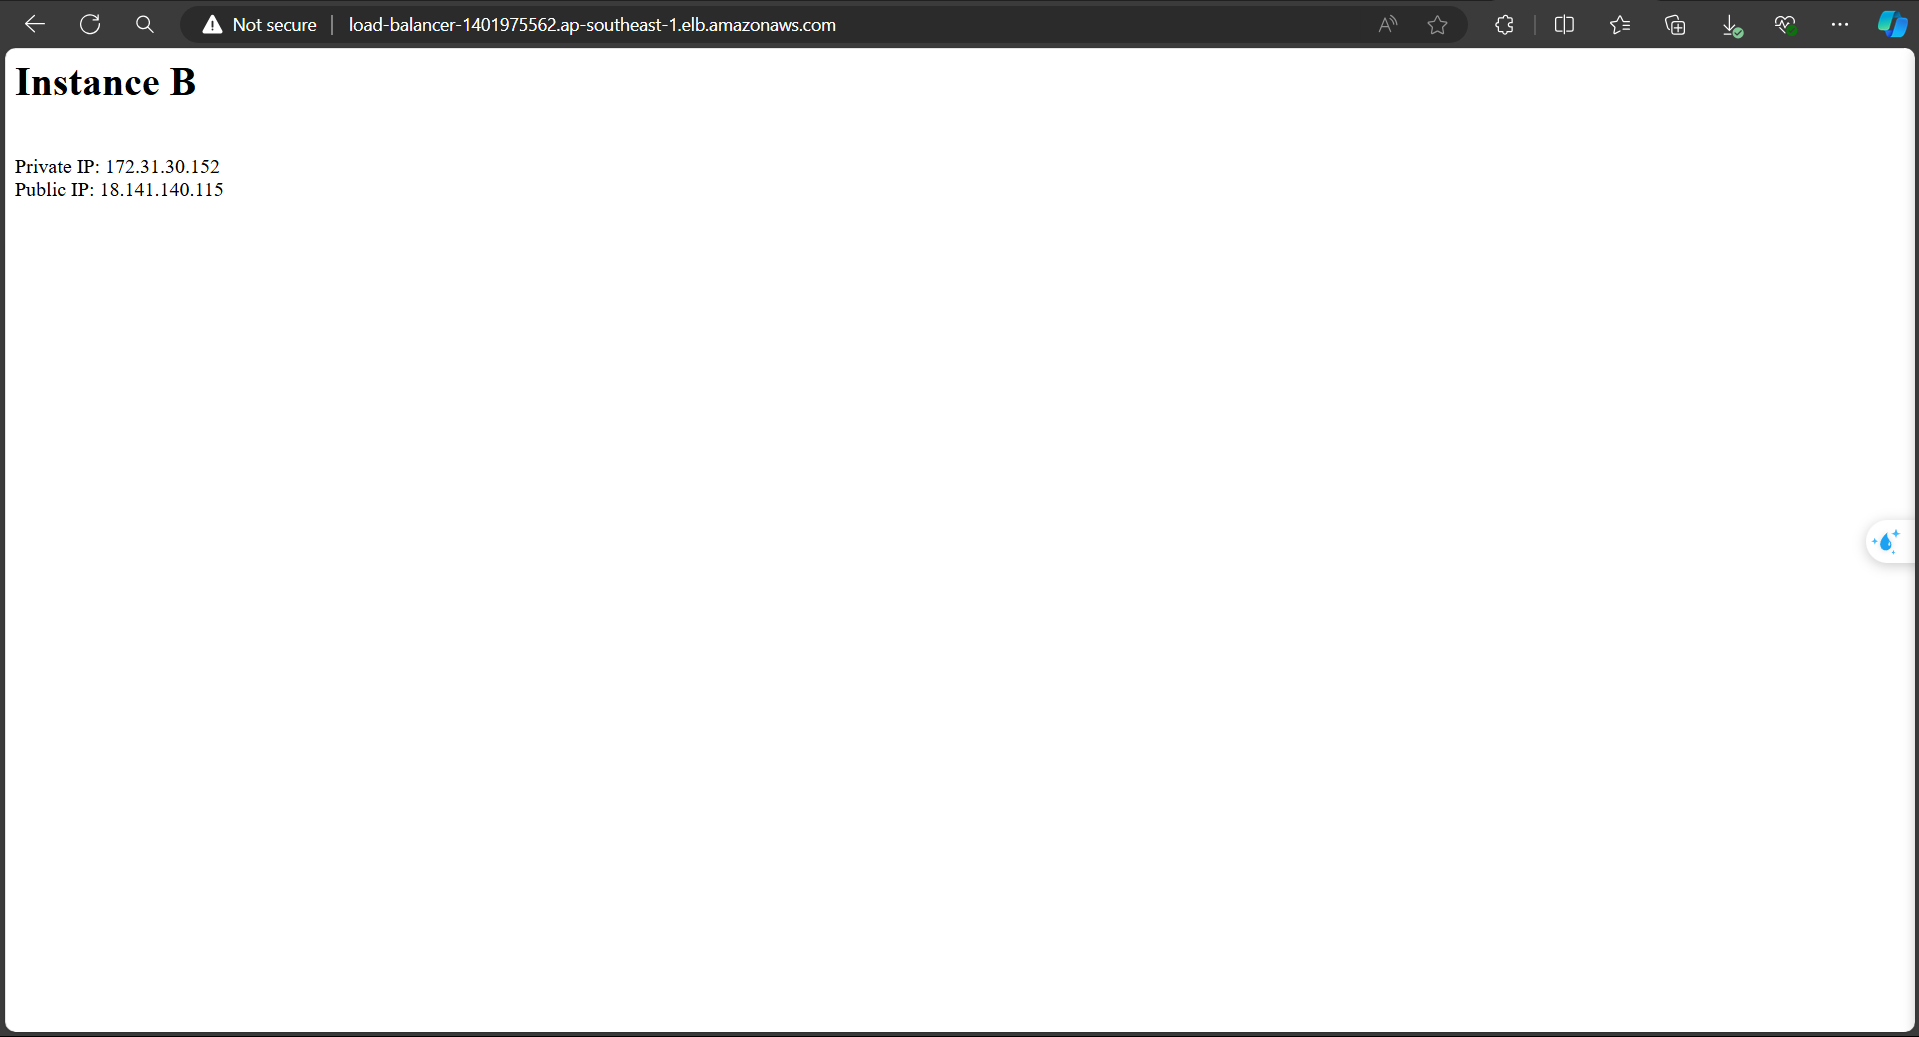
- After it changes to Active, click on the DNS name to access the website.
When reloading the website, you will see the switch between IPs and Instance names at a 50% rate.